
If you’ve dreamed of effortlessly fuller, more defined eyebrows without reaching for a pencil every morning, brow tint might be your new go-to. Whether you’re a seasoned brow aficionado or simply curious to try something new, getting familiar with the tinting process—and knowing what pitfalls to steer clear of—can drastically improve your outcome. This guide offers a clear, no-fluff breakdown on how to tint your brows the smart way, from preparation to aftercare. Think of it as your insider manual to beautifully bold arches—minus the sales pitch.
Getting to Know the Tint
At its essence, brow tint is a dye that temporarily darkens brow hairs, creating more structure and dimension for a long-lasting effect. It’s especially effective on lighter or sparser brows and provides that soft shadow effect underneath the hair, making brows appear naturally fuller and more shaped. For anyone exploring more ways to elevate their brow game, pairing tinting with lash-lifting treatments can create an even more defined frame around the eyes. A useful resource to consider is Beautiful Brows & Lashes, which offers starter kits designed with both brow and lash care in mind.
Visit the best lash-extension salon in Riyadh to achieve stunning, long-lasting lashes that perfectly complement your brows.
A Look at Ingredients & Options
Not all tints are created equal. Here are the main categories:
- Henna – Plant-derived and gentle on sensitive skin.
- Professional kits – Come with everything: developer, color, applicator, ideal for consistent results.
- DIY kits – Wallet-friendly and convenient, though results can vary.
Shade-Matching Made Simple
Choosing the right shade is essential. Start by identifying your skin’s undertone:
- Cool undertones – Go for medium or soft brown without red tones.
- Warm undertones – Opt for warmer browns with golden hues.
Generally, go one to two shades darker than your natural brow color for definition, or one shade lighter for a softer look. The website’s tint options cover a range of browns to suit different hair and skin combinations.
Start Smart: Prepping Matters
Before diving in, always perform a patch test 24 to 48 hours in advance. This helps rule out allergic reactions. Equally important is choosing a shade that flatters your hair and complexion while considering the skin underneath.
Don’t forget: apply a layer of petroleum jelly (like Vaseline) around the brows to shield your skin from stains.
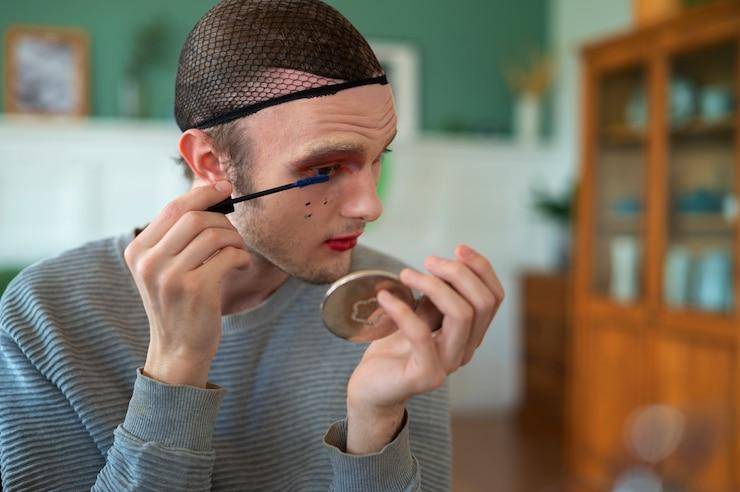
Step-by-Step Tinting Breakdown
- Clean your brows with mild soap and warm water to remove oils or residue.
- Use a white pencil or a brow gel to outline the ideal shape—this acts as your stencil.
- Blend your tint and developer per your kit’s instructions.
- Using a spoolie or angled brush, distribute the tint evenly across your brows.
- Let it sit for 3–10 minutes. Keep a close watch to avoid over-darkening.
- Gently wipe off the tint with a damp cotton pad, moving toward hair growth.
Tip: If you’re new to tinting, go for a shorter wait time—you can always layer more later, but reversing an overly dark result isn’t as easy.
Avoid These Common Tinting Mistakes
- Leaving the tint on too long → Brows turn out darker than intended.
- Picking the wrong shade → Results can look mismatched with your hair or makeup.
- Skipping that barrier cream → Hello, skin stains.
- Forgoing a patch test → Increases the risk of irritation or allergic reaction.
- Choosing a low-quality kit → Can lead to patchy or short-lived results.
. Choosing a trusted formula—especially a hybrid tint found in eyebrow tint kits —can significantly improve your brows’ look.
Aftercare Tips to Prolong Your Tint
Proper aftercare protects your skin and brow hairs and extends the results of your tint.
- Avoid washing the brow area for at least 24 hours after tinting to allow the color to set.
- Skip oil-based cleansers and skincare products near your brows, as oils can break down the tint faster and cause early fading.
- Avoid chlorine and direct sun exposure for the first 48 hours to prevent discoloration.
- Use a nourishing gel or aloe-based serum to keep brows hydrated, soft, and healthy.
- Limit makeup on or around the brow area for the first few days.
- Plan regular touch-ups every 3–4 weeks to maintain your ideal shade and shape. Consistency keeps brows looking their best.
Following these tips will help your tint last longer while minimizing the risk of irritation or uneven fading.
DIY vs. Professional Tinting: What’s Right for You?
Doing your brows at home offers flexibility and cost savings. You can tailor the process to your skin’s needs and get familiar with your unique brow structure, your natural brow code, so to speak.
However, a professional session brings expert precision. If you’re shaping your brows for the first time or want a specific look, a trained eye can craft the perfect arch, select the ideal shade, and apply it flawlessly, minimizing guesswork and maximizing confidence.
FAQs: Quick Brow Tinting Insights
- Can tinting harm my skin or brow hair?
Not if you follow the rules—use good-quality products, don’t skip the patch test, and never leave the tint on too long.
- What’s the best way to pick a shade?
Choose a tone one or two shades darker or lighter than your natural brows. Again, medium brown works for many.
- How long does a tint typically last?
Expect around 3–6 weeks, depending on your tint type, skin type, and the level of care you provide.
- Can I pair tinting with other brow treatments?
Yes, but space them out. Wait 24–48 hours between tinting and other treatments, such as waxing or lamination, to avoid skin irritation.
Final Words
Eyebrow tinting can be a game-changer—it enhances fullness, streamlines your routine, and sharpens your overall look. The key? Know your tools, understand the step-by-step process, and approach with care. Whether you’re reaching for a DIY kit or sitting in a salon chair, the goal isn’t just darker brows—it’s smarter beauty choices.